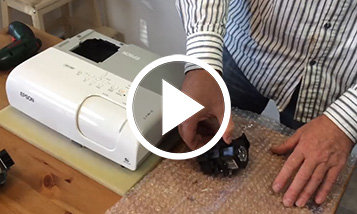
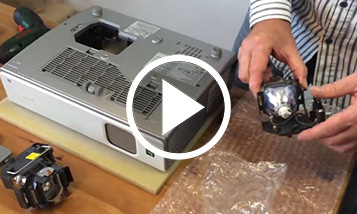
Video-instructaj pentru schimbarea becului în modulul lămpii
În demonstrația video veți viziona înlocuirea unui bec separat în modulul din lampa originală. Înlocuirea este demonstrată pe lampa POA-LMP108, utilizată în unele proiectoare Sanyo și EIKI. Pentru celelalte lămpi, procedura este similară, dar diferă în funcție de modul în care modulul lămpii este asamblat și cum sunt fixați conectorii. În acest exemplu, toți conectorii sunt înșurubați, iar înlocuirea lămpii goale este foarte ușoară. Dacă vreunul dintre conectori este fixat pe lampă, este necesar să folosiți un orificiu electric sau o cavitate pentru conectarea acestuia. În aceste cazuri, vă recomandăm înlocuirea lămpii individuale numai de către un profesionist.
Transcriere
- Open the cover of your original module
- Method of attachment of the cover may slightly differ for different lamps.
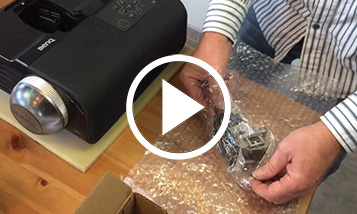
- Remember well the attachment of the original bulb and power cables
- We recommend taking a photo of the original wiring
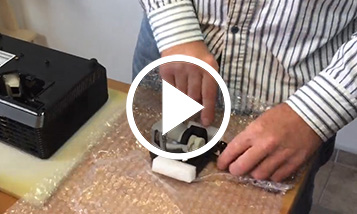
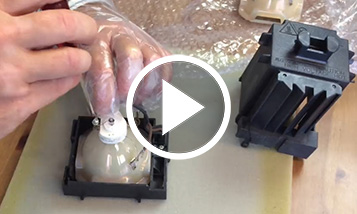
- Wear gloves
- Never touch the bulb with bare hand
- You can use e.g. gloves from gas station
- Unpack the new bulb
- Make sure that the bulb shape corresponds to the original one
- Designation of the bulb may not always be the same; it may be a bulb with the same parameters from another qualified manufacturer
- Remove the old bulb
- Disconnect and release the original bulb
- If some connector is securely bolted, you must use a metal eyelet that we can send you on request
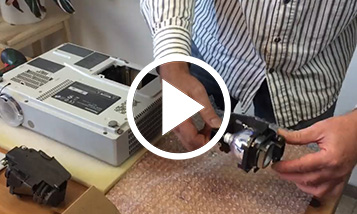
- Install the new bulb
- Always attach the connectors to the same location as they were before
- Most modules use two connectors only, do not confuse even those (it may be a DC bulb)
- Cover the lamp module
- Do not forget to reset the counter after settling the lamp module into the projector
- Follow the instructions in your projector manual,
- or check out our other videos.